You can update the expanded logical name for multiple tables/columns by scheduling a configuration job. The job updates the expanded logical name based on the table/column name, associated business term's name, and the associated business term's definition.
You should configure expanded logical name of tables and columns after scanning metadata.
You can run the job at both, system and environment levels:
- System level: The expanded logical name can be applied to all the tables and columns under the system. This includes all the environments under the system.
- Environment level: The expanded logical name can be applied to all the tables and columns under the environment.
For example, consider a scenario where you want to schedule a job to configure the expanded logical name of a table, RM_Resource and a column, Resource_ID. The parameters of the job are a business term catalog that has a business term, Resource, its definition, Sales Representative, and a splitter, Underscore (_). Refer to the following table to understand the parameters and their values:
|
Entity |
Value |
Comment |
|---|---|---|
|
Splitter (specified while scheduling the job) |
_(Underscore) |
|
|
Table Name |
RM_Resource |
Here, the part after the underscore (splitter), Resource, matches the Business Term. Therefore, it will be replaced with the business term definition and the part before the underscore, RM, will be retained in the expanded logical name. |
|
Column Name |
Resource_ID |
Here, the part before the underscore, Resource, matches with the Business Term. Therefore, it will be replaced with the business term definition and the part after the underscore, ID will be retained in the expanded logical name. |
|
Business Term |
Resource |
This should match with a part of the table and column names above. |
|
Business Term Definition |
Sales Representative |
In the updated expanded logical name, this will replace the part of the table/column name that matches the business term name. That is:
|
|
Expanded Logical Name |
<Blank> |
Expanded logical name is formed from the business term definition and part of table or column names. |
After the job runs successfully, the expanded logical name of the table and column is updated as mentioned in the following table:
|
Entity |
Expanded Logical Name |
Comment |
|---|---|---|
|
Table |
RM Sales Representative |
Here, RM retained from the table name and Sales Representative is added from business term definition. |
|
Column |
Sales Representative ID |
Here, ID is retained from the column name and Sales Representative is added from business term definition. |
To configure expanded logical name, follow these steps:
- In the Data Catalog pane, right-click a system or environment.
- Click Configure Expanded Logical Name.
- Select or enter appropriate values in the fields. Fields marked with a red asterisk are mandatory. Refer to the following table for field descriptions.
- Columns: Indicates that the expanded logical names of all the columns in this system are configured
- Tables: Indicates that the expanded logical name of all the tables in this system are configured
- Both: Indicates that the expanded logical names of all the tables and columns in this system are configured
- Local: Refers to your local machine.
- Server: Refers to the machine where erwinDIS has been deployed.
- Click
 .
.
The available options appear.
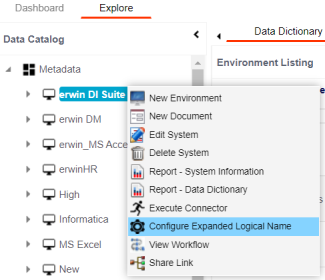
The Configure Expanded Logical Name page appears.
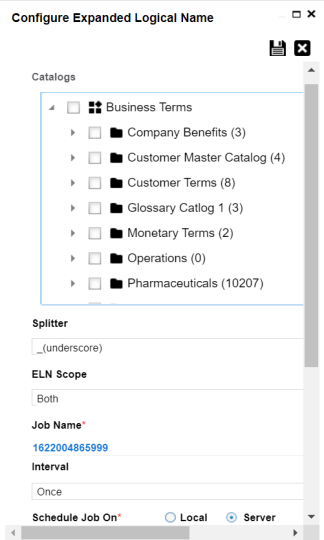
|
Field Name |
Description |
|---|---|
|
Catalogs |
Select the catalog containing the required business term. |
|
Splitter |
Select appropriate splitter based on the table name or column name. |
|
ELN Scope |
Select an appropriate scope of the job. |
|
Job Name |
A default job name is autopopulated. You can modify it and enter a job name. |
|
Interval |
Select an interval of the job. Interval sets the frequency of the job. For example: If you set the interval every week then the job will be executed every week. |
|
Local or Server |
Select the machine whose clock decides the time of the scheduled scan. |
|
Schedule Job On |
Select date and time of the execution of the job. |
|
Notify Me |
Turn the Notify Me to ON to receive a notification email about the scheduled job. |
|
Notification Email |
This field is autopopulated with your email ID. You receive email notifications about the scheduled job from the Admin Email ID, configured in the Email Settings. For more information on configuring Admin Email ID, refer to the Configuring Email Settings topic. |
|
CC List |
Enter a comma-separated list of email IDs that should receive the job notification. |
The job is scheduled and added to the Scheduled Jobs list on the Scheduled Jobs tab.
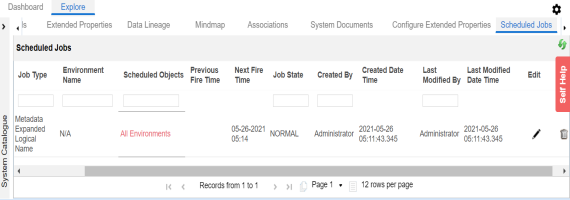
You can edit the job using ![]() or delete it using
or delete it using ![]() .
.
The job is executed at the scheduled time and the expanded logical names of tables and columns are updated.
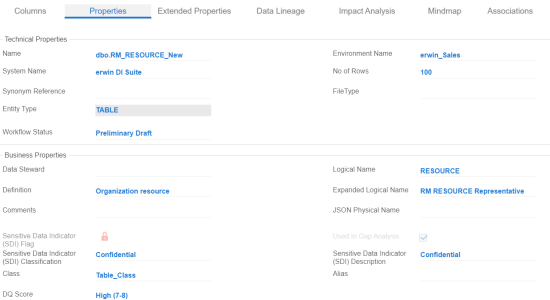
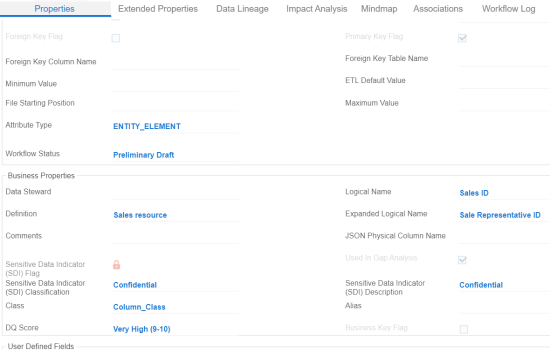
You can use this job to update the expanded logical name only once. Alternately, you can update expanded logical names under table properties and column properties.
|
Copyright © 2022 Quest Software Inc. |